Set up product customisations
Use this when a product isn’t built from scratch but still needs work before it ships. Engraving, embroidery, monogramming, a gift message that has to be printed and tucked in the box. The item exists; someone has to do something to it.
Setup has two halves that you can do in either order: telling Orderkraft which products can be personalised, and telling it which line item attributes count as personalisation.
Before you start
Find the exact attribute key your storefront sends. Open a past Shopify order that had personalisation on it and look at the line item properties. You want the key, not the value: Engraving, Embroidery Text, custom_message, whatever it happens to be.
Get this from a real order rather than from your options app’s settings screen. What the app displays and what it writes to the line aren’t always the same string, and Orderkraft matches on the string.
Mark the product as customisable
- In Orderkraft, go to Products.
- Open the product, or click Add product and pick it from the Shopify picker if it isn’t there yet.
- In the product summary on the right, a badge under the product name reads either Customisable or Not customisable. Click the pencil beside it.
- Turn the switch on and save. The badge turns green.
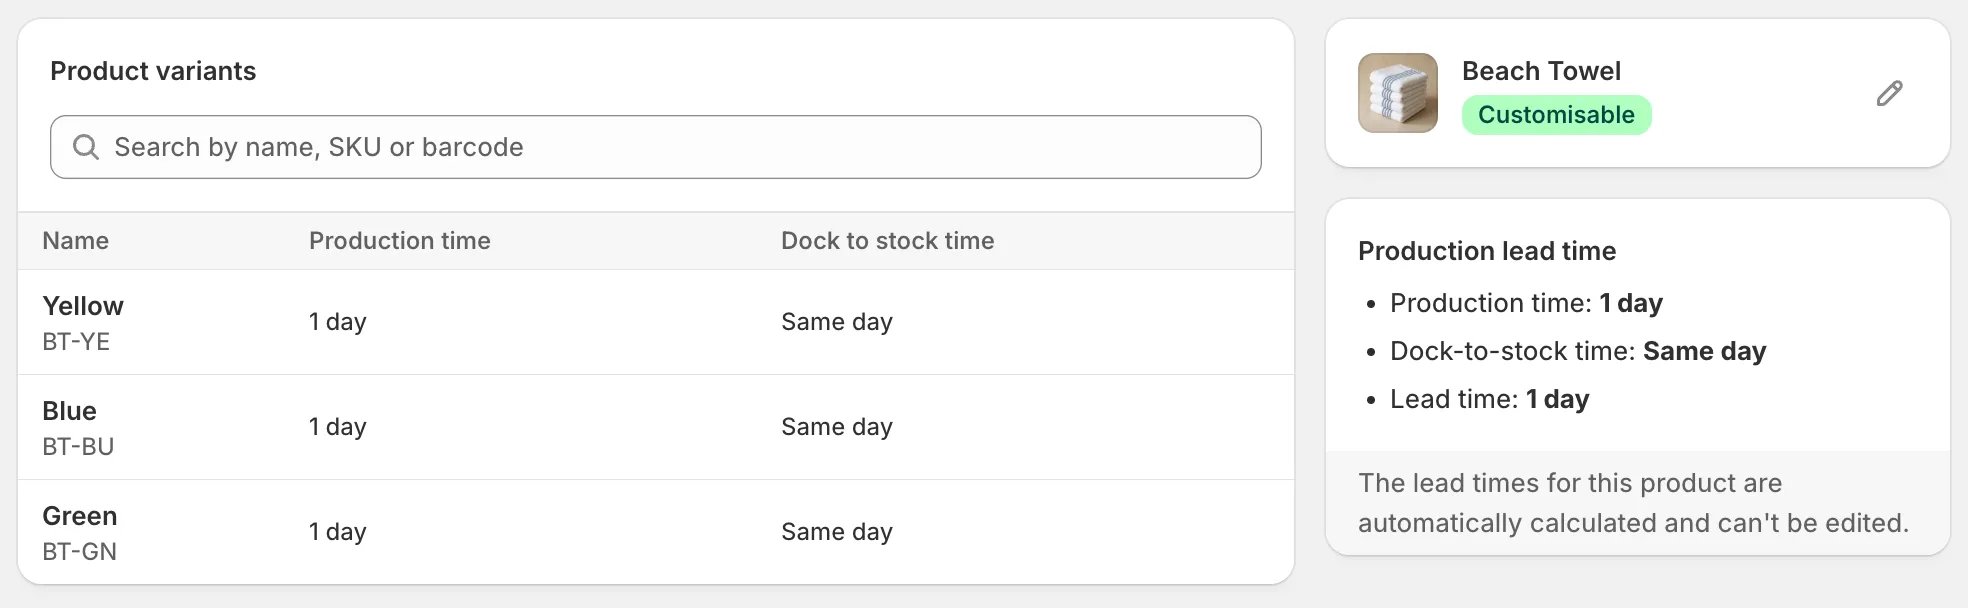
Customisable, and still carrying the one-day lead time it was created with.
You don’t need a bill of materials. A product with an empty one is fine, and that’s the normal shape for something you stock and then personalise. Leave the materials out unless you’re actually consuming them.
Turn the switch off for products where the attributes on the line are always internal plumbing rather than something a person has to act on.
Create a customisation intent
- Go to Settings → Customisation intents.
- Click Add customisation intent.
- Set the name to what your production team should read: Engraving, Embroidery, Gift message.
- Set the code to the attribute key from the order, exactly as it appears.
- Add a description if the intent needs explaining to whoever picks it up next.
- Save.
Intents are shop-wide. You need one per kind of personalisation, not one per product.
The code has to match exactly. Engraving and engraving are two different keys as far as matching goes, and a trailing space counts. This is the part that goes wrong, which is why the next step exists.
Test it with a real order
Open an intent and there’s a Test with a real order panel beside the form. Type an order number from your store and Orderkraft lists every line on that order, every attribute each line carries, and ticks the one your code matched.
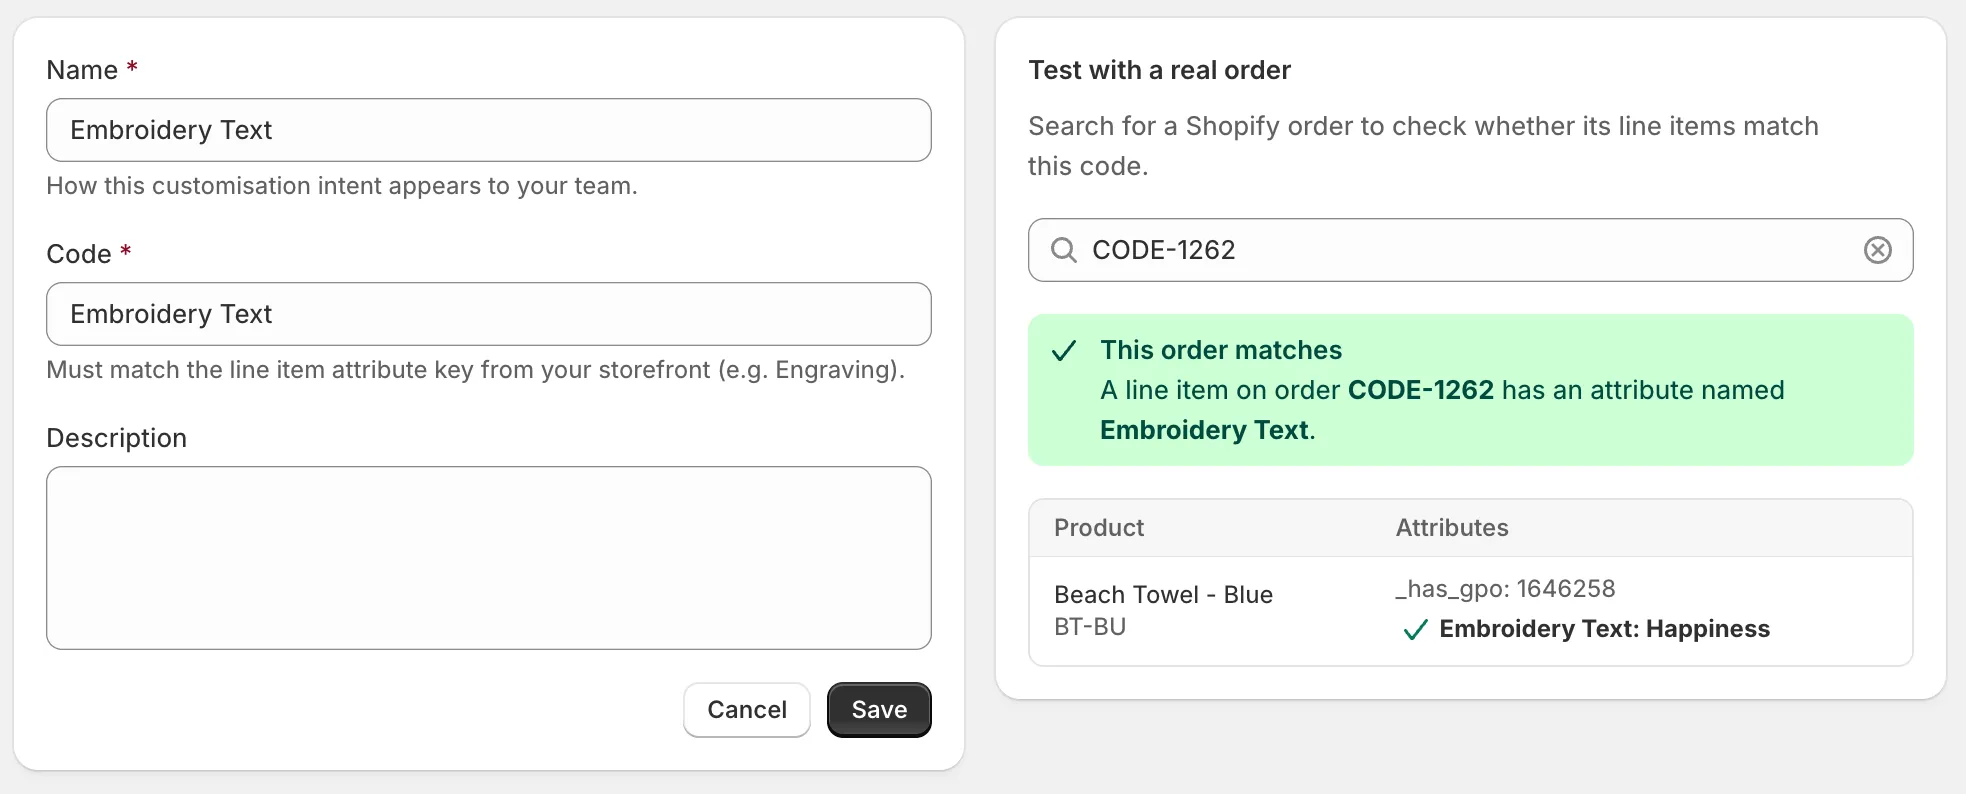
The tick is on the attribute that matters. The _has_gpo above it is exactly the noise that never reaches production.
Two things worth knowing about it:
It tests the code currently in the form, not the one that’s saved. Paste a key in, watch it match, and only then save. When it doesn’t match, the panel still lists every attribute on the line, which is usually enough to spot the stray capital or the trailing space.
It looks for the order in Orderkraft first and only asks Shopify if it hasn’t seen it. Any order in your store works, including ones from before you installed Orderkraft. Use the order number as Shopify shows it.
Check that it works end to end
Place a test order for the product with the personalisation filled in, or wait for a real one. Then open Manufacturing orders in Orderkraft. You should see a new order for that line, with the customisation listed under the name you gave the intent and the value the customer entered.
If nothing appeared, work through the three conditions in order:
- Is the product marked customisable?
- Did the order line actually carry the attribute? The test panel above answers this against the real order.
- Does the intent code match the key character for character?
Matching happens when the order arrives, so an intent only applies going forward. Orders that came in before you set it up aren’t reprocessed.
What happens to the rest of the order
Adding a product to Orderkraft flags it as made-to-order on your Shopify store, which is what split shipments and the lead time block both read.
If split shipments are on, that product is held back from the rest of the order and fulfilled from a production location. For something being engraved, that’s correct. Check that your production locations are set up, or the constraint has nowhere to send it.
If the lead time block is on your product page, the customer sees a lead time for that product. A new variant starts at one day of production and same-day dock-to-stock, which is what the screenshot above is showing, and almost certainly not your engraving turnaround. The product’s own lead time is calculated from its variants and can’t be edited directly, so open each variant and set the times there before the product page starts making promises on your behalf.
What’s next
- Customisations for how matching works and what happens when you delete an intent
- Track production on the Shopify order page to see the customisations from Shopify Admin
- Automate with Shopify Flow to tag or route orders once the customisation work is done